A good design composition can be helped with a trained eye, but with enough exposure, practice and proper use of tools, you will find a great deal of improvement in your work.
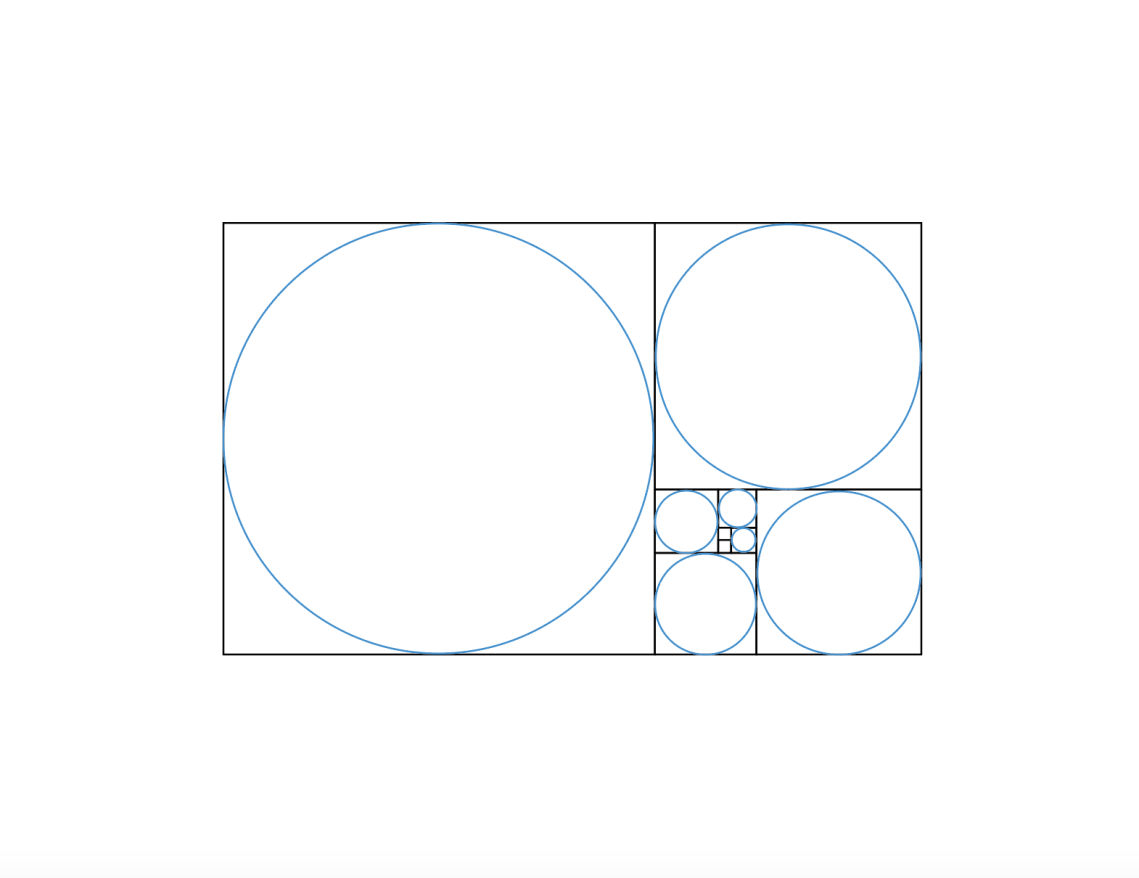
In art school, you’ll learn the many different ways to approach composition and one of them is the “grid system” inspired by the Swiss. As a designer, I strive to achieve symmetry, harmony and proportion in my work by using grids as guidelines and utilizing techniques such as “The Rule of Thirds” (a technique widely used in photography) or “The Golden Ratio”, which is a mathematical formula that dictates proportion in design or in nature (See Fibonacci Sequence).
There are many ways you can apply The Golden Ratio to your designs and you can read more about it here. For this exercise, I’ll be showing you how you can apply this technique to your logo design.
 Step 1: Using Adobe Illustrator CC, pull up the working file here to get you started.

Step 2: Upload a sketch of your final logo design. Before this exercise, you would have already refined your design ideas and went through different rounds of iteration of the logo you would like to digitize. (This can be learned in a different design class, which requires more reading and practice on Design Principles.)
The purpose of this tutorial is to show you how it is very helpful to use a guideline such as the Golden Ratio to achieve symmetry in your final art execution.
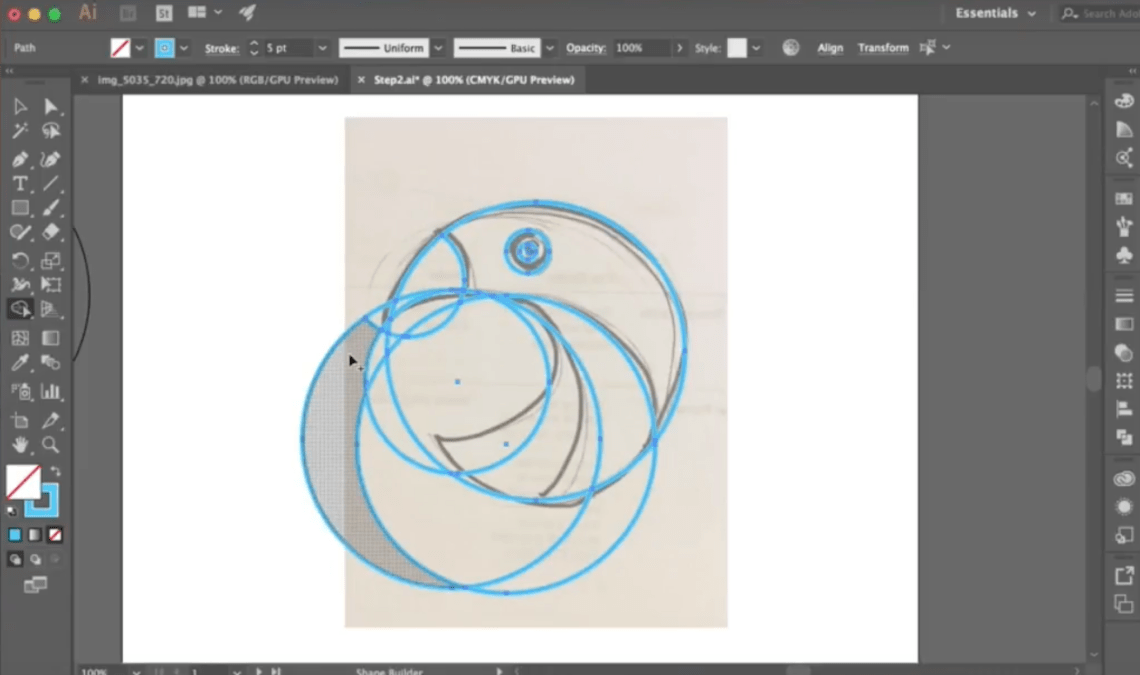
Step 3: Separate the circles from the rest of the template, you won’t need the rectangles for this exercise. Once you have extracted it, align them using the Horizontal or Vertical Align tools on the top.


Step 4: Use the Golden Ratio circles to plot and trace the lines on your sketch.
Keep in mind, you must not resize the circles as they are meant to guide the symmetry of your design. Try to imagine how these circles will translate your lines into a digital version and use these basic shapes to form the logo design you have envisioned.
Video: How to Use Golden Ratio Circles on Your Sketch
![]()
Step 5: Using the Shapebuilder tool, subtract and add the shapes. To subtract, use Alt + Click, and to add shapes, simply drag the shape builder tool on the shapes you’d like to add. Watch the video below to see how the shapebuilder tool works.
Video: How to Use the Shapebuilder Tool
Step 6: Pick a color scheme that suits your design. Experiment using the color guide feature!


Step 7: Voila! You are now an expert Golden Ratio Logo Designer! Now challenge yourself and go through the steps with other graphical sketch ideas!
![]()
Submissions from students:
1. Roberto, Design Intern
![]()
2. Jasmine, Social Media Manager interested in learning design